

Amazon Music Unlimited is a standalone or premium music streaming service that costs $7.99/month for prime users and $9.99/month for non-prime users. It features more than 60 million songs along with tons of stations and playlists. It also supports a downloading feature for offline streaming. But, if you have decided it’s time for a change or want to try some other streaming service, you need to cancel your Amazon Music Unlimited subscription to avoid getting charged automatically.
How to Cancel Amazon Music Unlimited Subscription
#1 Launch your preferred browser and visit amazon.com.
#2 Log in to the Amazon account that you used for Music Unlimited. Skip this step if you’re already logged in.
Information Use !!
Concerned about online trackers and introducers tracing your internet activity? Or do you face geo-restrictions while streaming? Get NordVPN - the ultra-fast VPN trusted by millions, which is available at 69% off + 3 Months Extra. With the Double VPN, Split tunneling, and Custom DNS, you can experience internet freedom anytime, anywhere.

#3 Go to your Account & Lists menu and select Memberships & Subscriptions.
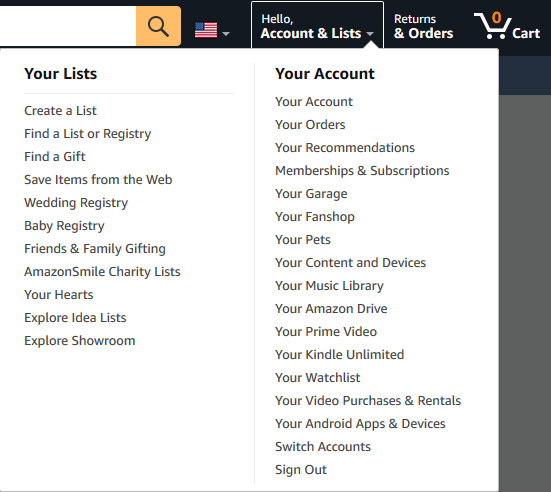
#4 Select Music Subscriptions.
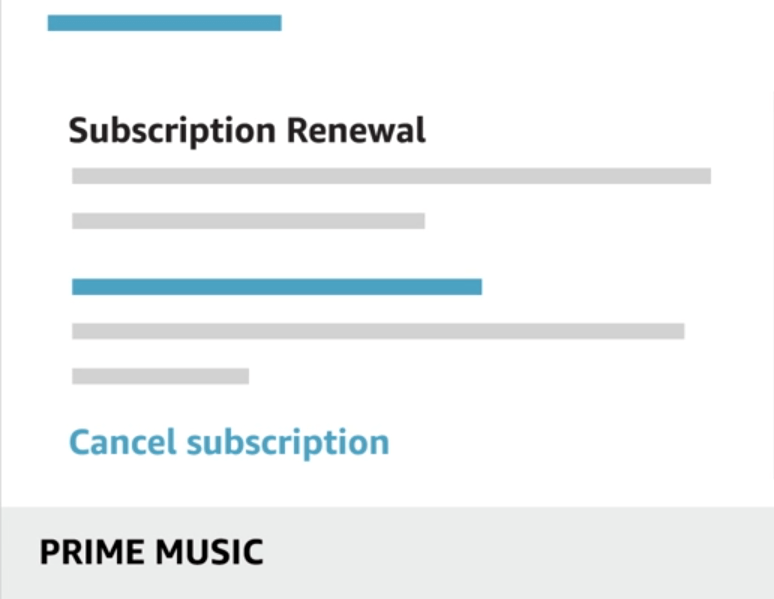
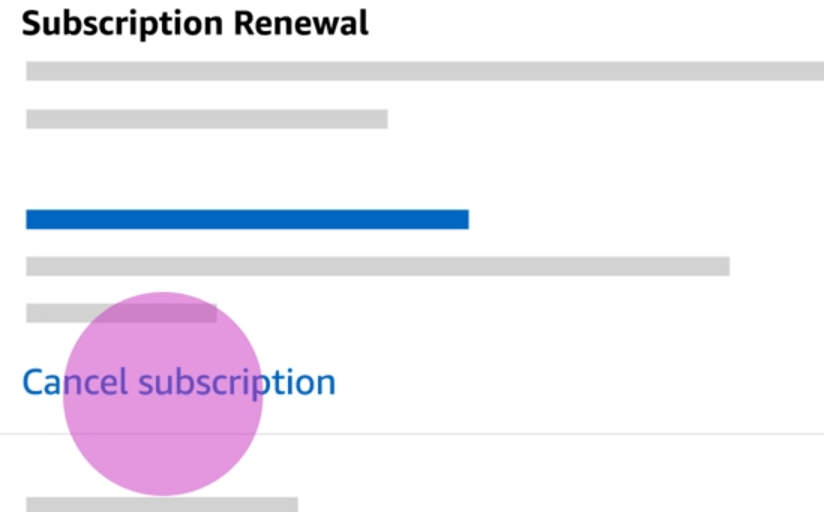
#5 Navigate to the Subscription Renewal section of Amazon Music Unlimited and select the Cancel subscription menu.
#6 The subscription ending date will appear on the screen. Click Confirm cancellation to complete the process.
Note – You can continue using the Music Unlimited subscription till the end of the billing period.
When it comes to smartphones, you can cancel the service only on Android devices. iOS users need to rely on the web browser to cancel the service.
Related: How to Cancel Amazon Kindle Subscription
To Cancel on Android devices:
#1 Launch the Amazon Music app.
#2 Select the Gear shaped icon on the top left corner of app.
#3 Select Amazon Music Unlimited.
#4 Your payment information will appear on the screen.
#5 Scroll down to Subscription section and tap Cancel subscription.
#6 Click Confirm cancellation.
If you have purchased Amazon Music via iTunes, head to the Apple Website or iOS device settings to cancel the service. After canceling the service, all the songs and playlists that you added will be removed.
Thank you for visiting techfollows.com. Use the below comments section to mention the queries and feedback related to this guide. Follow us on Facebook and Twitter for more related guides.
Disclosure: If we like a product or service, we might refer them to our readers via an affiliate link, which means we may receive a referral commission from the sale if you buy the product that we recommended, read more about that in our affiliate disclosure.