

Angry IP Scanner is an application which is used to determine the IP address and the port connections of your Network. The Angry IP Scanner is an Open-source and multi-platform application which is designed to make port scanning fast and simple. This IP Scanner is available for Windows, Mac, Linux and a few other platforms as well. This IP Scanner is widely used by people across the world in different sectors like banking, government agencies, small and large enterprises. Let us discuss more on Angry IP Scanner and the steps to download it on Windows, Mac and Linus in this post.
Features of Angry IP Scanner
With more than 29 million downloads, this IP Scanner has plenty of features in it. Here are the main features:
- It scans the local network and the internet as well.
- It creates a shared network between the connected LAN devices.
- Scans all the networks and gives the result with number of alive and dead connection.
- Results can be exported to files.
- Multi-platform and open source application.
- Portable version available as well. (No installation required).
These are the various features of Angry IP Scanner.
Information Use !!
Concerned about online trackers and introducers tracing your internet activity? Or do you face geo-restrictions while streaming? Get NordVPN - the ultra-fast VPN trusted by millions, which is available at 69% off + 3 Months Extra. With the Double VPN, Split tunneling, and Custom DNS, you can experience internet freedom anytime, anywhere.

You may also like: Advanced IP Scanner
How to install Angry IP Scanner for Windows?
You can install this IP Scanner on Windows easily. Follow the below steps to install Angry IP Scanner for Windows:
#1: Open Angry IP Scanner official website or click here.

#2: Click the download tab on the top.

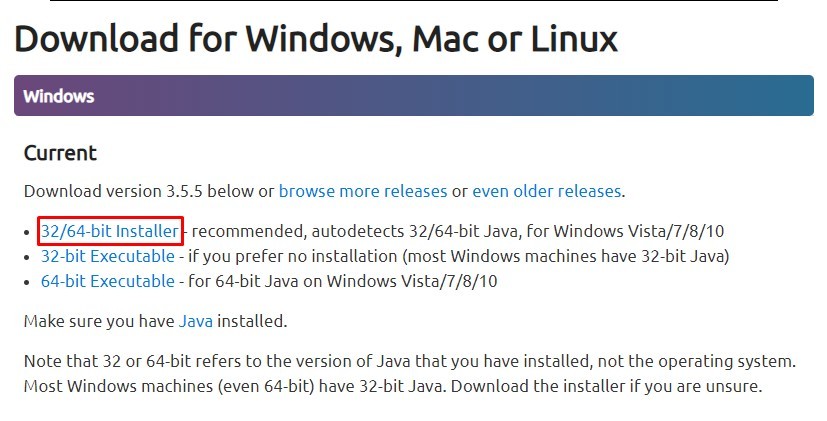
#3: Under Windows, choose the 1st option “32/64-bit Installer” and click on it.
#4: The application will start downloading.

#5: Once the application gets downloaded, click on it and open the application.

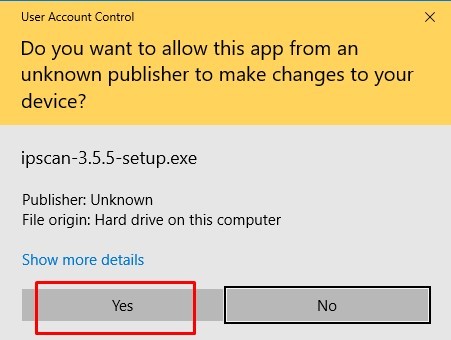
#6: A dialog box will open, click “Yes” to proceed.
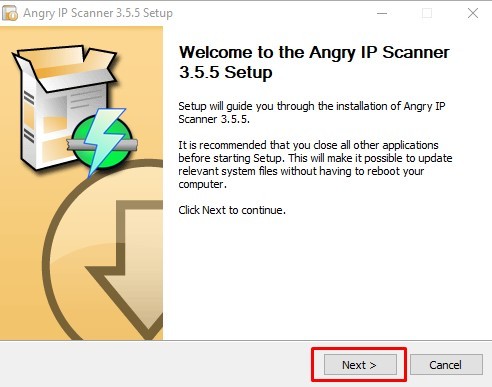
#7: The Angry IP Scanner installation setup box will open. Click “Next” to proceed.
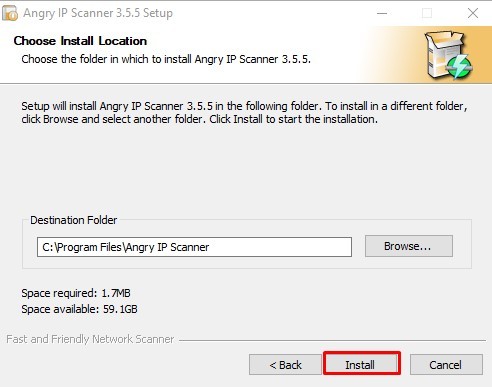
#8: Choose the installation destination folder and click “Install“.
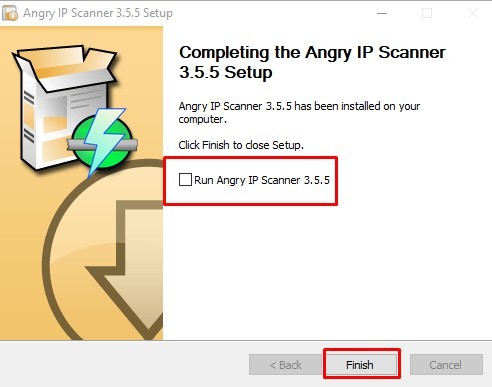
#9: Once installed, click “Run” radio button and click “Finish“.
These are the ways to download Angry IP Scanner on your Windows PC.
You may also like: Advanced IP Scanner Portable
How to install Angry IP Scanner for Mac OS?
Angry IP Scanner is available for MAC OS as well. Here are the steps to install Angry IP Scanner for Mac OS:
#1: Open Angry IP Scanner official website or click here.
#2: Click the download tab on the top.
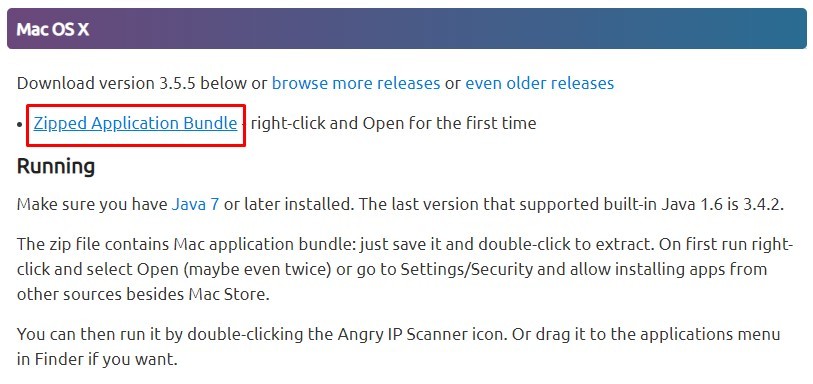
#3: Scroll down and click on MAC OS X Tab.
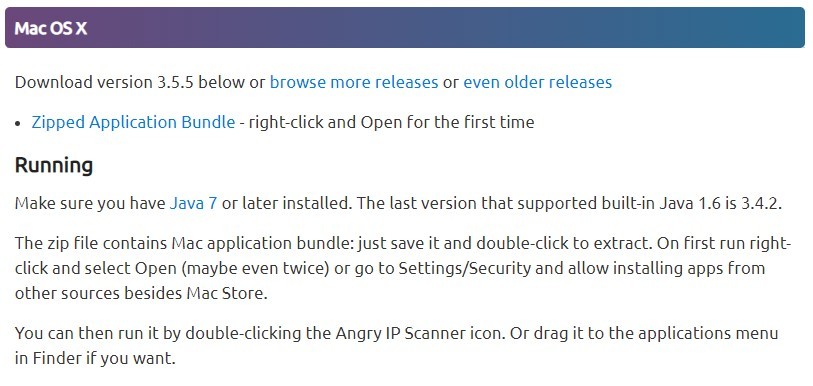
#4: Click on “Zipped Application Bundle“. The application will get downloaded.
#5: Once the application gets downloaded, Unzip the bundle.
#6: Open folder Angry IP Scanner -> Contents -> MAC OS -> Open the executable file.
#7: The IP Scanner will open. Click “Start” to start scanning the IP Ranges.

These are the steps to install Angry IP Scanner for MAC OS.
You may also like: Chromecast Setup Guide
How to install Angry IP Scanner for Linux?
This IP Scanner can also be installed in Linux as well. Here are the steps to install Angry IP Scanner for Linux:
#1: Open Angry IP Scanner official website or click here.
#2: Click the download tab on the top.
#3: Scroll down and click “Linux” section.
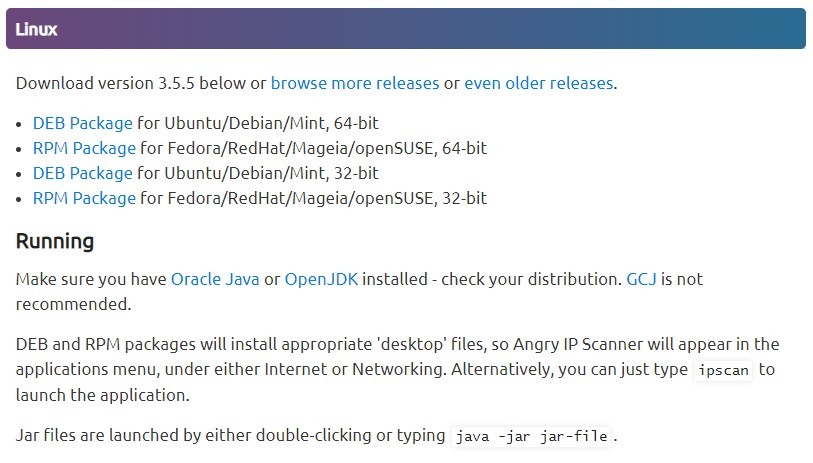
#4: You can choose any one of the DEM or RPG Package depending on the system and click on it.
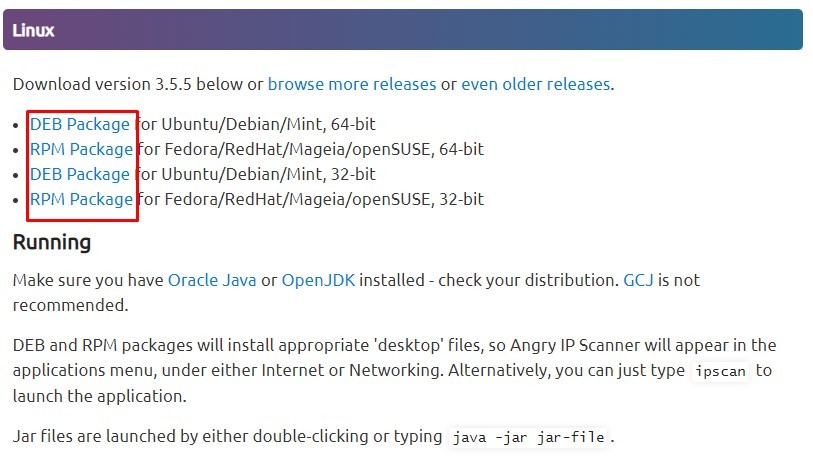
#5: The application will get downloaded. You can open the application once it gets downloaded.
#6: Once the application gets installed, you can use it to scan the devices connected to your network.
These are the steps to install Angry IP Scanner for Linux.
How to use Angry IP Scanner?
After installing the scanner, follow the below steps to use it:
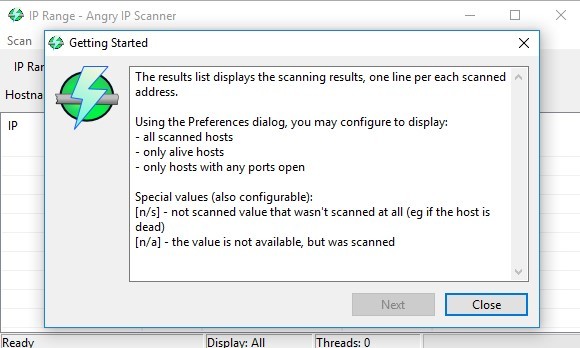
#1: The application will open with the “Getting Started” pop up. Click “Next“.
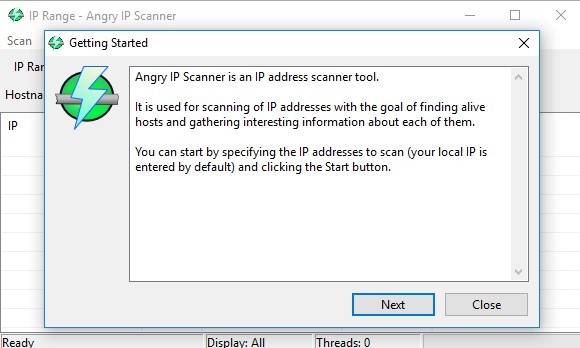
#2: Click “Next” wherever it prompts and finally click “Close“.
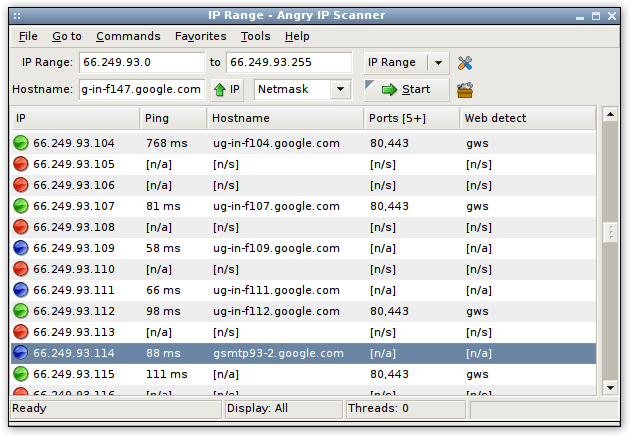
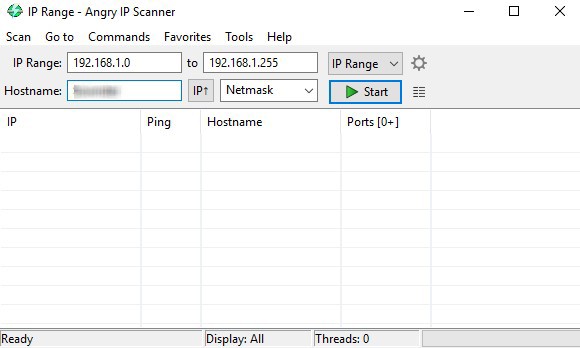
#3: This is the home page of Angry UP Scanner. Click on “Start” button.
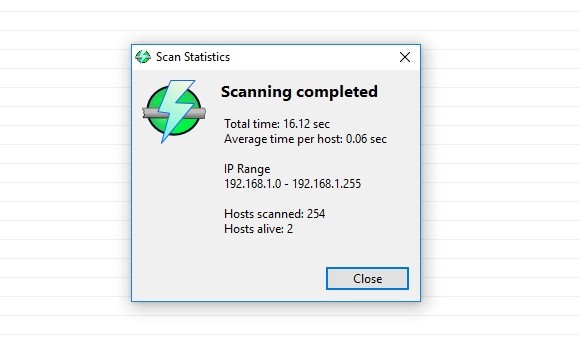
#4: Once the scan completes. A tab opens with the “Alive connection” and total IP Range scanned. Note it down and close it.
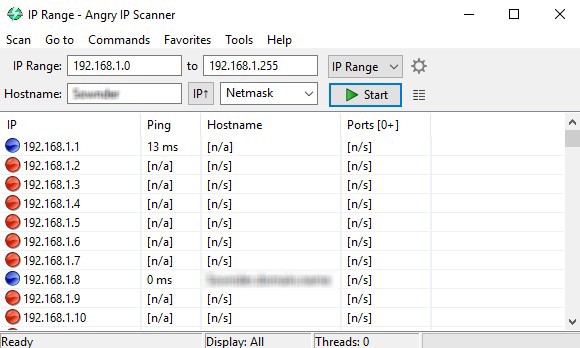
#5: You will get the results in the homepage. The number of connected devices will appear.
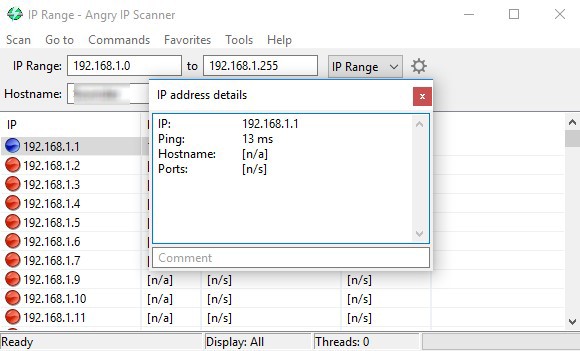
#6: Right click on any IP to get the menu details. Click “Show details” to shows the details of that particular connectivity.
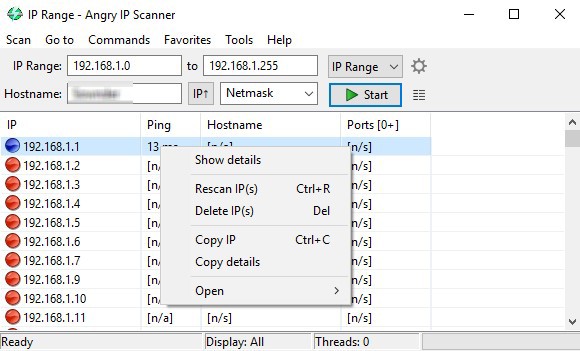
#7: The “IP Address Details” gets displayed.
You can also ping to other devices and share files to other devices connected in the same network using this IP Scanner.
You may also like: How to install VPN on Roku?
How to install Angry IP Scanner for Android?
Angry IP Scanner is not available officially on Android. You can choose the alternative application for this IP Scanner and install it on your android device.
There are few applications named as “Angry Port Scanner” available in Google Play Store. You can install such application by directly launching it on Google Play Store and install it on your Android.
We aren’t sure whether that android application was developed by the developers of this IP Scanner. So before installing, make a research and then install it on your Android.
Wrapping UP
By using Angry IP Scanner on your computer, you can get all the details about the connected devices. You can set a network folder and access the folder from all the connected devices. By using this, you can share documents and folder in a very quick way within your LAN connection. As it is multiple platform application, you need not worry about the device OS.
Thank You for reading this post. Visit www.techfollows.com for more Tech tips and reviews. Leave your feedback and queries in the comment section below.
Disclosure: If we like a product or service, we might refer them to our readers via an affiliate link, which means we may receive a referral commission from the sale if you buy the product that we recommended, read more about that in our affiliate disclosure.