

Roku is a streaming device with approximately 30000+ apps on the Roku Channel Store. The Roku Channel Store is the App Store for Roku Streaming devices and TV. This Channel Store consists of apps in different categories, such as Music, Entertainment, Games, Educational, etc. You can easily add any app from the Roku Channel Store on your device. There are four different ways to add the channels on Roku. All the possible ways to install the apps on Roku are discussed below.
How to Download Apps on Roku
1. Turn On and connect the Roku to a strong WiFi.
2. Select the Streaming Channels option on the home screen and hit Search Channels.
Information Use !!
Concerned about online trackers and introducers tracing your internet activity? Or do you face geo-restrictions while streaming? Get NordVPN - the ultra-fast VPN trusted by millions, which is available at 69% off + 3 Months Extra. With the Double VPN, Split tunneling, and Custom DNS, you can experience internet freedom anytime, anywhere.


3. Using the virtual keyboard, type the app name you want to download on the search bar.
4. Select the Channel from the search results and click the +Add channel option.
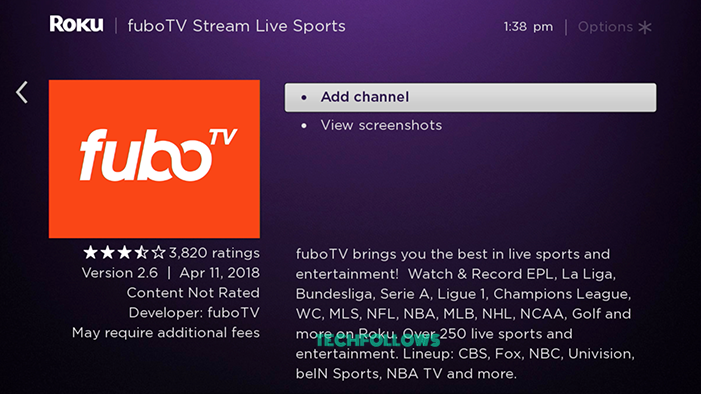
5. After installation, hit Go to channel option to launch the app.
How to Install Apps on Roku Via Roku Website
1. Open a browser on your PC or Smartphone and visit the Roku Channel Store website.
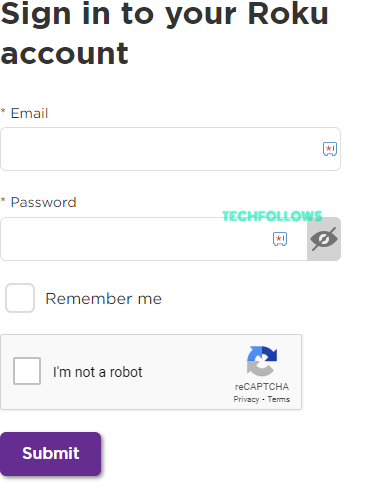
2. Enter the login credentials of your Roku account to sign in.
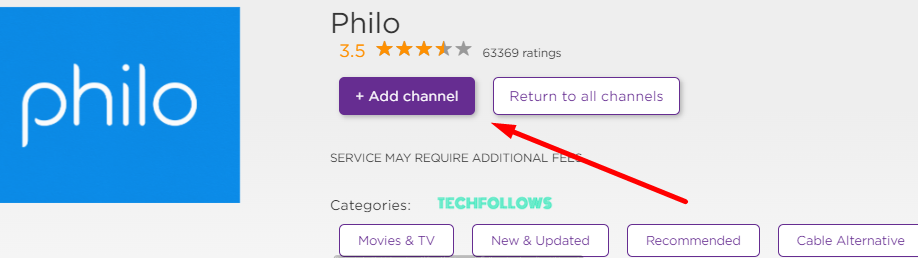
3. On the search field, type the channel name and pick the app from the search suggestions.
4. Finally, hit the +Add channel button to download the app.
5. That’s it. Now, the channel will be added to your Roku device within 1-day.
6. To add the channel immediately to your Roku device, then update your Roku device.
In addition, you can also add Private Channels on Roku on the Roku website.
How to Add Apps on Roku Via Roku Mobile App
1. On your Smartphone, install the Roku App from Play Store or App Store.

2. Then, connect the smartphone to the same WiFi as your Roku.
3. Open the Roku App after installation and Sign In to your Roku account.
4. Follow the on-screen procedures to pair the app to your Roku.
5. Once paired, navigate to the search bar and search for any app.
6. Select the app from the search results. Then, tap Add Channel to install the app on Roku.
7. If you can’t find the app on the Roku TV home screen, go to Settings → System → System update → Check now → Update Roku.
How to Add Channels on Roku Via Vanity Code
1. Open a web browser on your PC and go to the website https://my.roku.com/account/add?channel=VANITY_CODE. Replace the VANITY_CODE with the channel’s access code.
2. Log In to your Roku account using the required credentials.
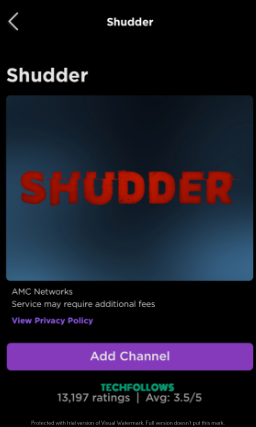
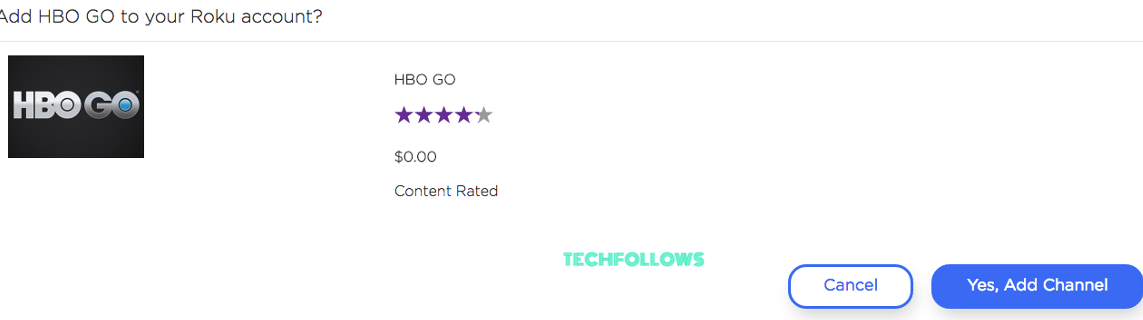
3. On the app info page, click the Yes, Add Channel button to install the app on your Roku device.
If the channel is not added to your Roku device, update your Roku and check again.
How to Remove Channels from Roku
1. Go to the Channels section on the Roku home screen.
2. Navigate and highlight the channel you want to remove.
3. Press the * (Asterisk) button on the Roku remote.
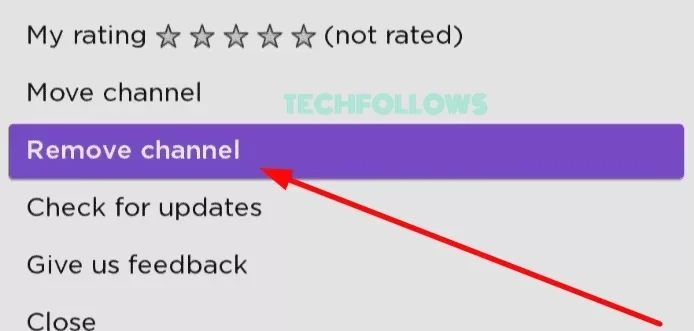
4. Select the Remove Channel option from the pop-up menu.
5. Confirm the process to uninstall the app on Roku.
FAQ
The Roku Channel, Crackle, and Tubi are the free channels available on Roku.
Yes. You can sideload apps by enabling the developer mode on Roku.
Disclosure: If we like a product or service, we might refer them to our readers via an affiliate link, which means we may receive a referral commission from the sale if you buy the product that we recommended, read more about that in our affiliate disclosure.