

Nintendo Switch is a popular gaming console because it has a portable console and dock. It has an excellent game library. Are you a Nintendo Switch gamer who likes to play its games on the big screen? Then you are in the right place. Everyone likes to play games on the big screen as it gives a delightful experience. There are two easy ways to connect the Switch to the TV. You connect the Nintendo Switch to your TV by using the dock or USB-C to HDMI adapter.
How to Connect Nintendo Switch to Your TV With Dock
The following are the steps to connect Nintendo Switch to your TV. To connect the Switch to your TV, you need a few materials.
Required Materials:
- Nintendo Switch Dock
- Nintendo Switch game unit with Joy-Cons
- AC adapter
- HDMI cable
- HDMI-compatible TV
Once you collect these materials, you can start connecting Nintendo Switch to your TV.
Information Use !!
Concerned about online trackers and introducers tracing your internet activity? Or do you face geo-restrictions while streaming? Get NordVPN - the ultra-fast VPN trusted by millions, which is available at 69% off + 3 Months Extra. With the Double VPN, Split tunneling, and Custom DNS, you can experience internet freedom anytime, anywhere.

1. Open the back cover of the Switch dock and make sure you place the Nintendo Switch dock near your Television.
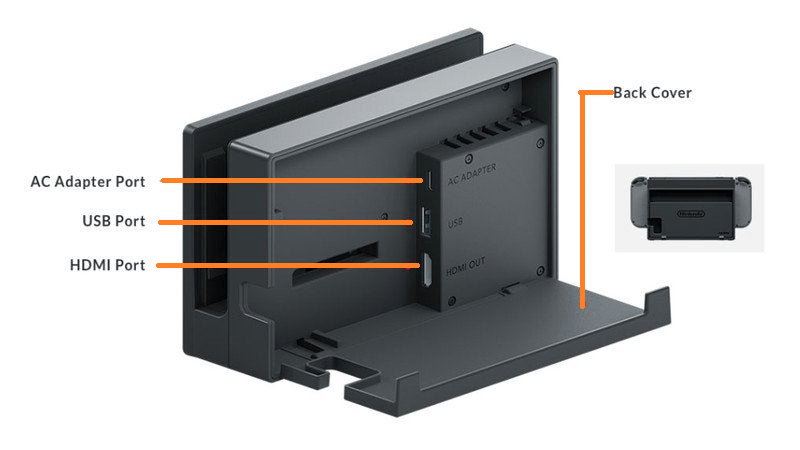
2. Find three labeled ports named AC Porter, USB, and HDMI OUT.
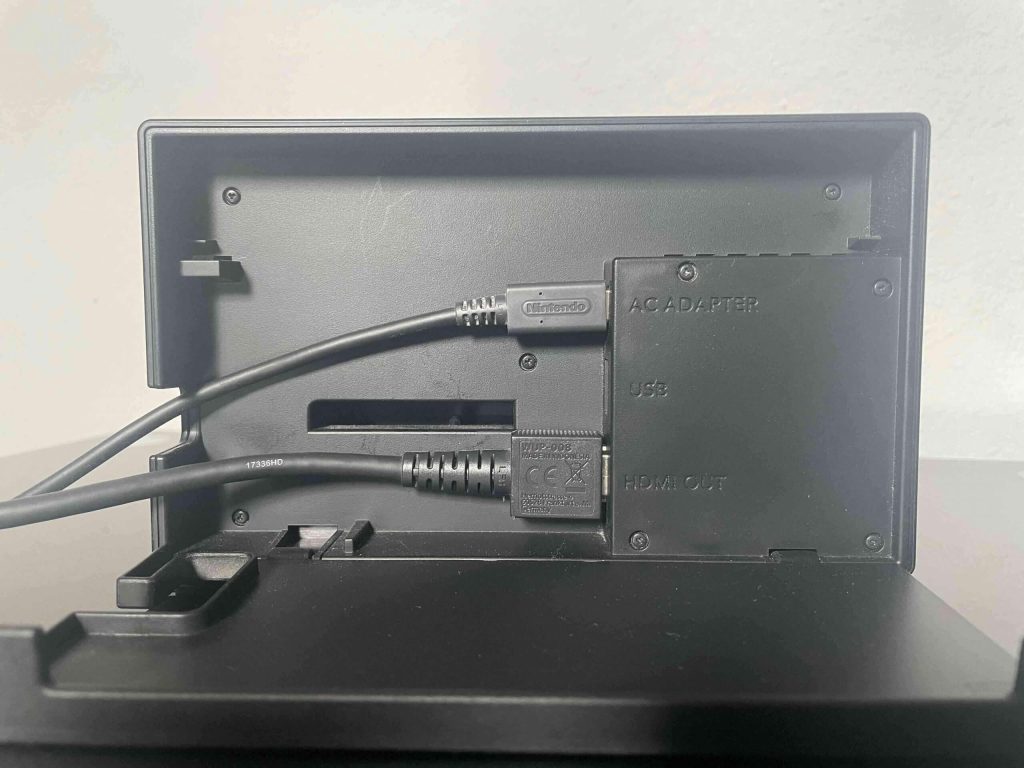
3. Connect one end of the cable to the AC port and the other end to the wall socket.
4. Next, connect one end of the HDMI cable to the HDMI port on the dock and the other end to the HDMI port on the back of the TV.
5. Route the cables through the notch in the dock and close the back cover of your Nintendo Switch dock.
6. The next step is to remove the Joy-Con controllers from the Switch console. To remove it, you can press the button on the back of your Joy-Con and slide it upward to remove it.
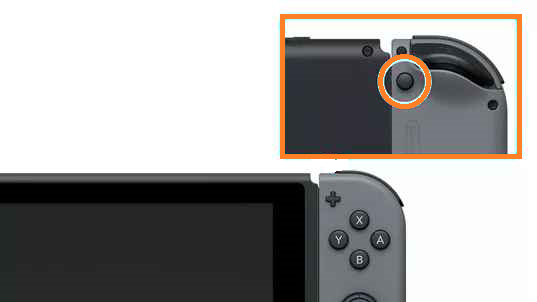
7. Follow the same to remove your second Joy-Con.
8. Put the Nintendo Switch into the dock and ensure that the screen is facing the front side of the dock, where you can find the Nintendo Switch logo.
9. Turn On your Nintendo Switch and your Television.
10. Finally, set the input on your TV to the corresponding HDMI port you used. Now, play your favorite Nintendo Switch game on your TV.
How to Connect Nintendo Switch to TV Without Dock
You can also connect Nintendo Switch to a TV without a dock. For that, you need to buy a USB-C to HDMI adapter.
1. Place the Nintendo Switch near your Television.
2. Connect one end of the HDMI and USB-C power cable to the USB-C to the HDMI adapter.
3. Then, connect the other end of the HDMI cable to the HDMI port of your TV. Similarly, connect the other end of the USB-C power cable to the wall outlet.
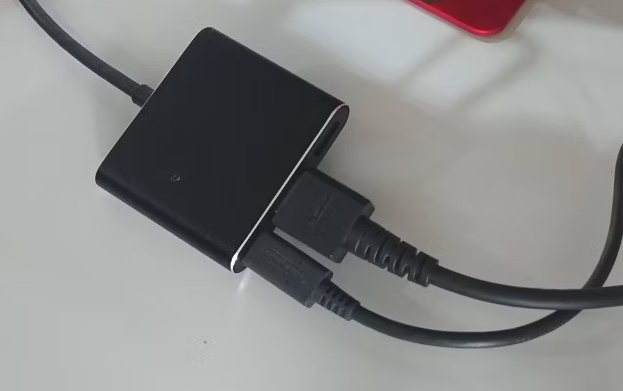
4. Next, connect the adapter to your Nintendo Switch.
5. Adjust the input on your TV and select the corresponding HDMI port.
6. Finally, you can start playing the Switch games on your TV without the dock.
You may think connecting the Nintendo Switch is monotonous work. But with a little patience and dedication, you can make it simple. Connect Nintendo Switch to your TV and have a fun experience by playing games on a big screen.
Nintendo Switch Won’t Connect to TV: Best Fixes
If you can’t play Nintendo Switch games on your TV due to connectivity issues, refer to the steps below.
- Try a different HDMI cable or power cable.
- Check whether you have changed the TV Input correctly.
- Restart Nintendo Switch.
- Reset the adapter.
- Ensure that the Switch is updated to the latest version.
FAQ
No, Nintendo Switch Lite doesn’t support TV mode.
Yes. You can use Nintendo Switch without a TV because it comes with a built-in screen.
You can easily connect Nintendo Switch to Samsung TV with or without a dock.
Yes. You can connect a keyboard or mouse to Nintendo Switch with the help of a dock.
Disclosure: If we like a product or service, we might refer them to our readers via an affiliate link, which means we may receive a referral commission from the sale if you buy the product that we recommended, read more about that in our affiliate disclosure.