

Quick Answer
- Bitdefender VPN is not available in the Amazon App Store of Firestick or Fire TV.
- You can sideload the Bitdefender VPN using Downloader or ES File Explorer on Firestick.
Bitdefender is a freemium VPN service with 4000+ server locations in 49+ countries worldwide. You cannot install the Bitdefender VPN on Firestick as the app is unavailable in the Amazon App Store. But you can use Downloader or ES File Explorer on Firestick to sideload the Bitdefender VPN app.
The free version of this VPN lets you access limited features. To unlock more features and use the Bitdefender VPN without any restrictions, buy a premium plan.
In this article, you will learn about the steps to sideload the Bitdefender VPN on Firestick or Fire TV.
Information Use !!
Concerned about online trackers and introducers tracing your internet activity? Or do you face geo-restrictions while streaming? Get NordVPN - the ultra-fast VPN trusted by millions, which is available at 69% off + 3 Months Extra. With the Double VPN, Split tunneling, and Custom DNS, you can experience internet freedom anytime, anywhere.

How to Install Bitdefender VPN on Firestick using Downloader
#1. Turn On your Amazon Firestick and navigate to the Find icon.
#2. Click the Search bar.
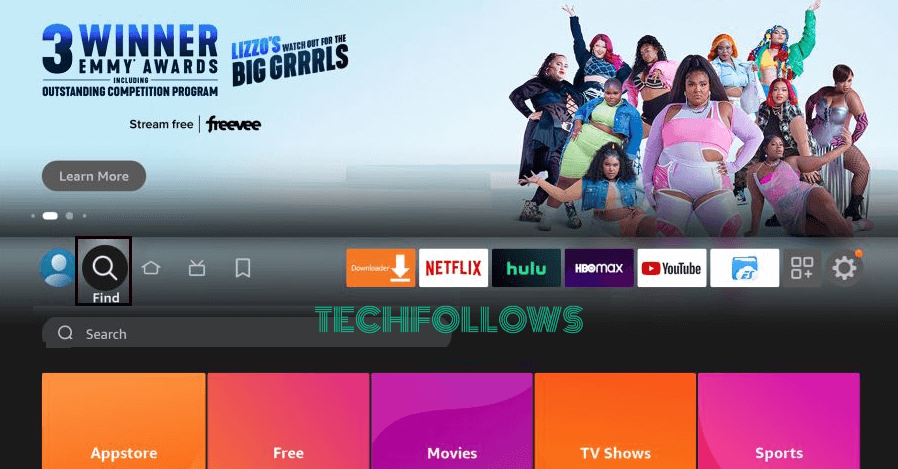
#3. Type Downloader on the search bar using the virtual keyboard.
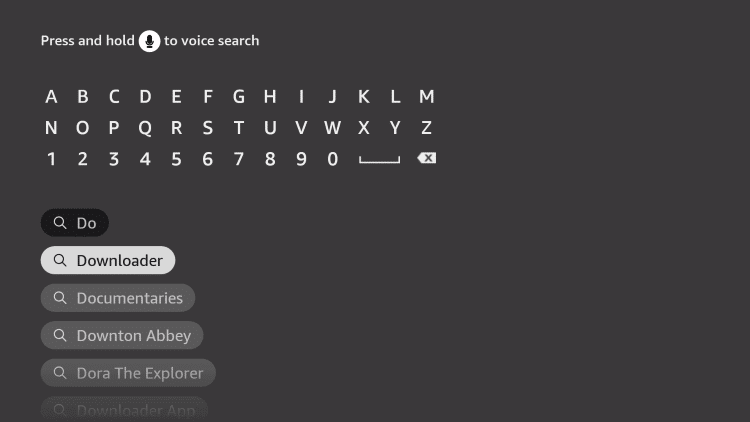
#4. Select the Downloader app from the search results.
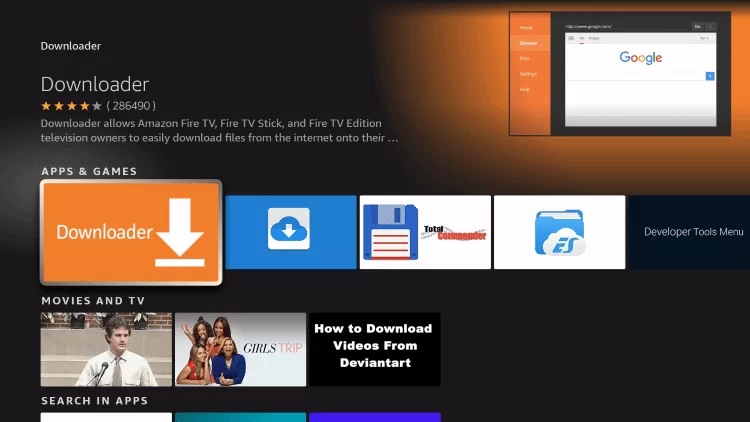
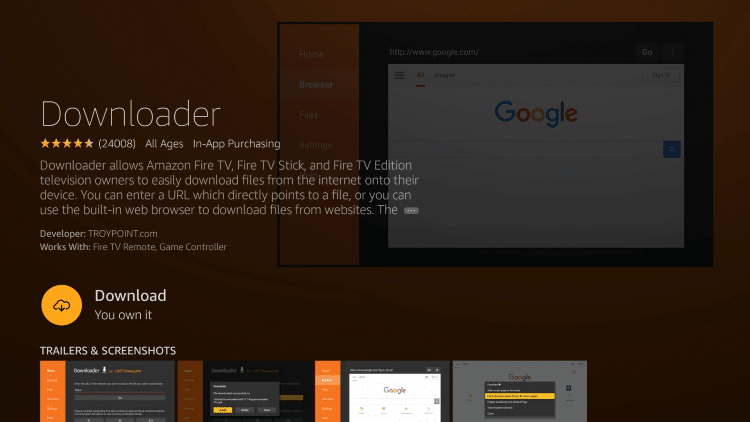
#5. Click the Download icon to install the Downloader app on Firestick.
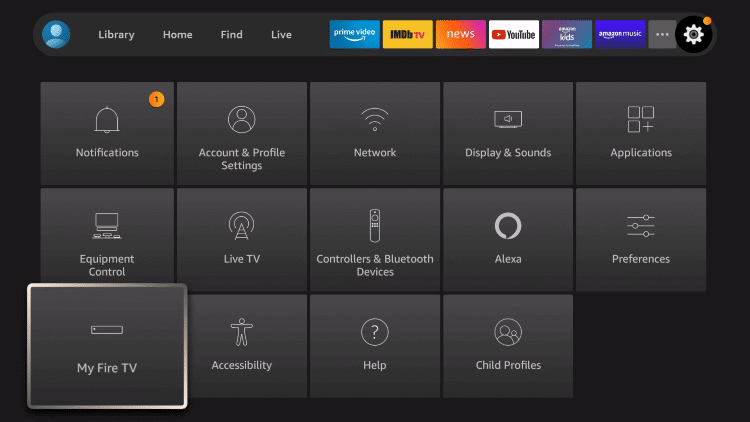
#6. After installing the Downloader app, move to the Firestick Settings and click My Fire TV.
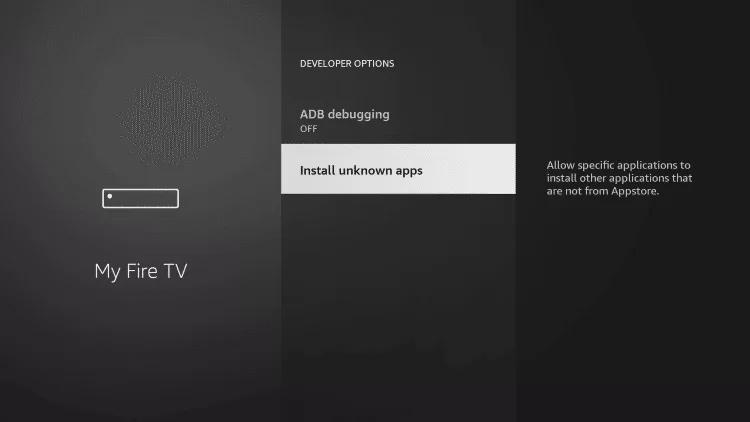
#7. Select Developer Options and tap the option Install Unknown Apps.
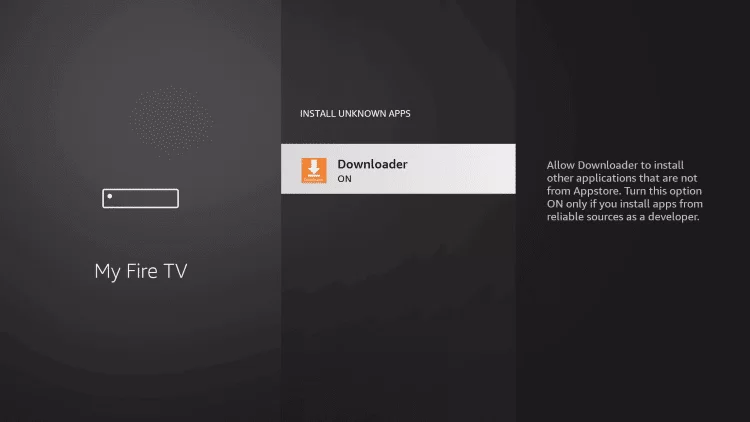
#8. Look for the Downloader app and tap the toggle button placed near it.
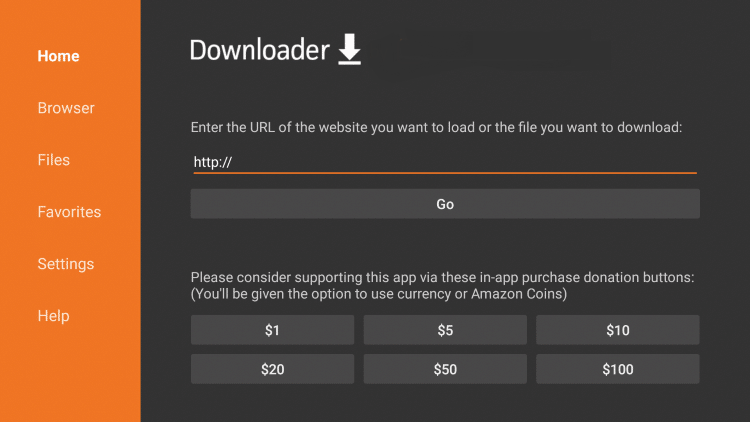
#9. Once enabled, launch the Downloader app on Firestick and give access to all the necessary permissions.
#10. Tap the URL box and enter the Bitdefender APK link.
#11. Select the Go button and wait for the apk file to download.
#12. After downloading the APK file, click Install on the pop-up menu.
#13. Once installed, launch the Bitdefender VPN app and use it to bypass the geo-restrictions.
How to Get Bitdefender VPN on Firestick using ES File Explorer
Before moving into the steps, get a premium subscription ($9.99/month) for ES File Explorer.
#1. Navigate to the App Store and install the ES File Explorer on your Firestick.
#2. Open the app after installation and grant access to the required permissions. Then, subscribe to the premium version of ES File Explorer.
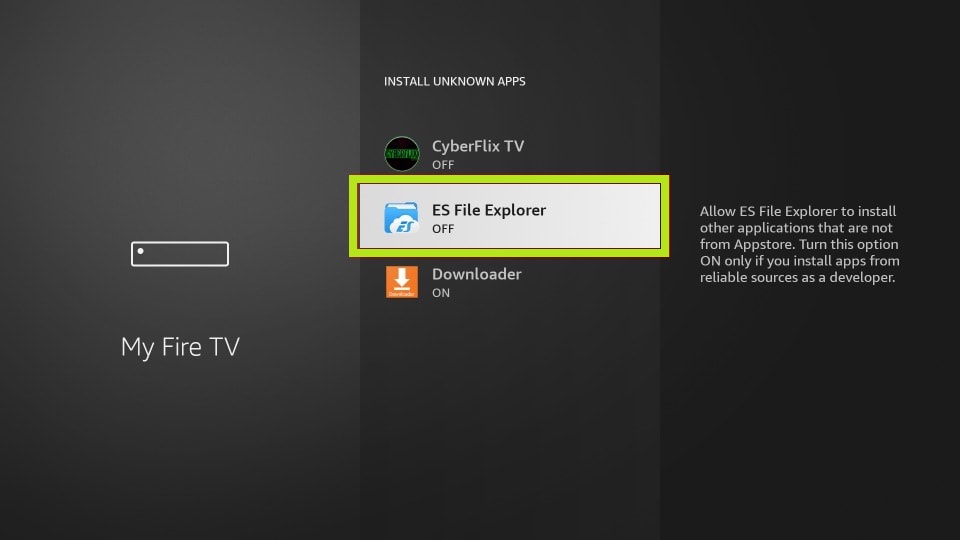
#3. Once done, navigate to Firestick Settings >> Hit My Fire TV >> Select Developer Options >> Tap Install unknown apps >> Turn ON ES File Explorer.
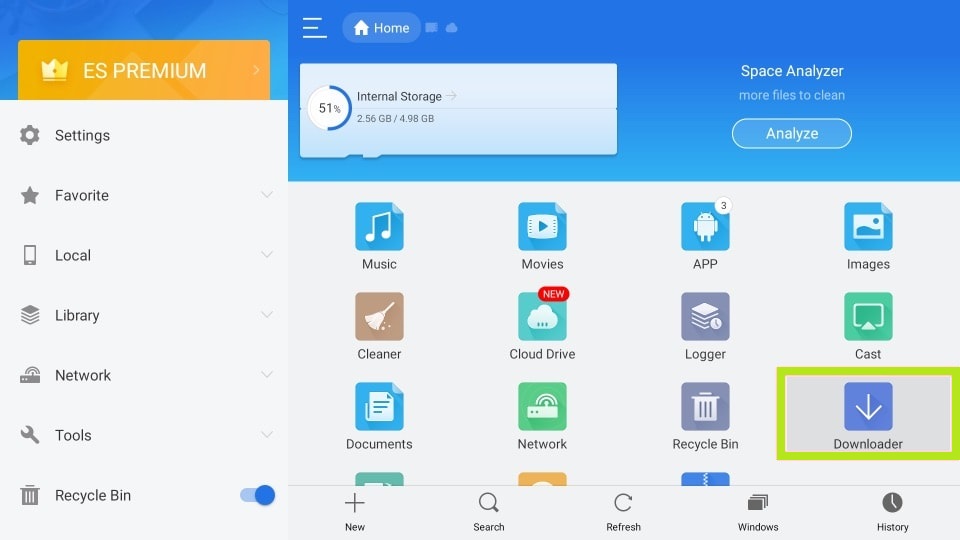
#4. After enabling the option, launch the ES File Explorer app on your Firestick.
#5. Tap the Downloader icon on the app’s interface.
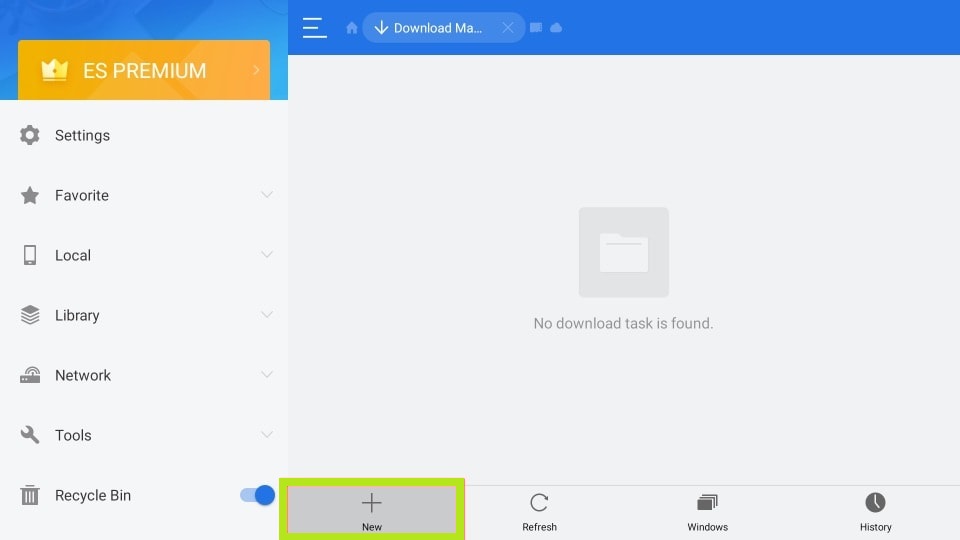
#6. Select the +New icon displayed at the bottom.
#7. On the pop-up menu, type the Bitdefender VPN APK link in the path field and type the name Bitdefender VPN in the name field.
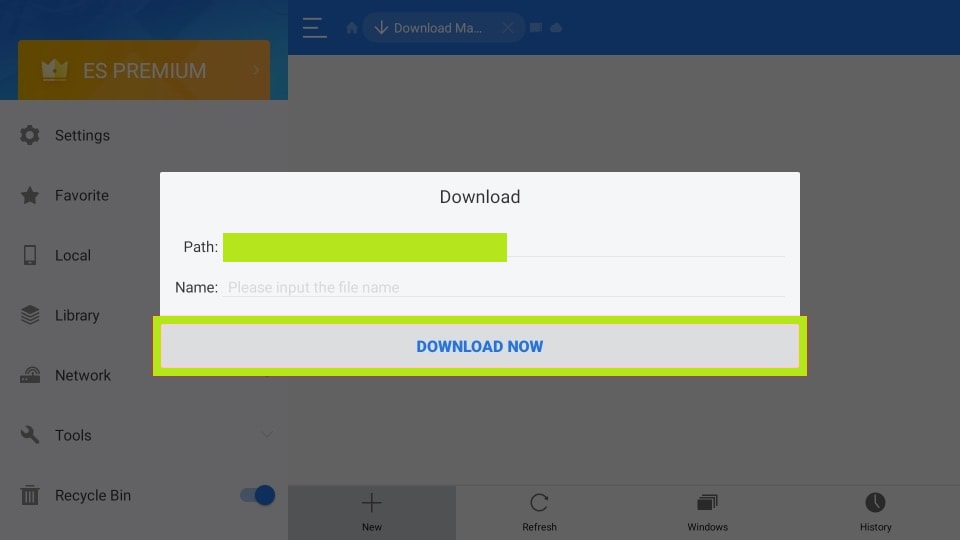
#8. Tap the Download Now button and select the option Open File once the APK is downloaded. Then, tap Install.
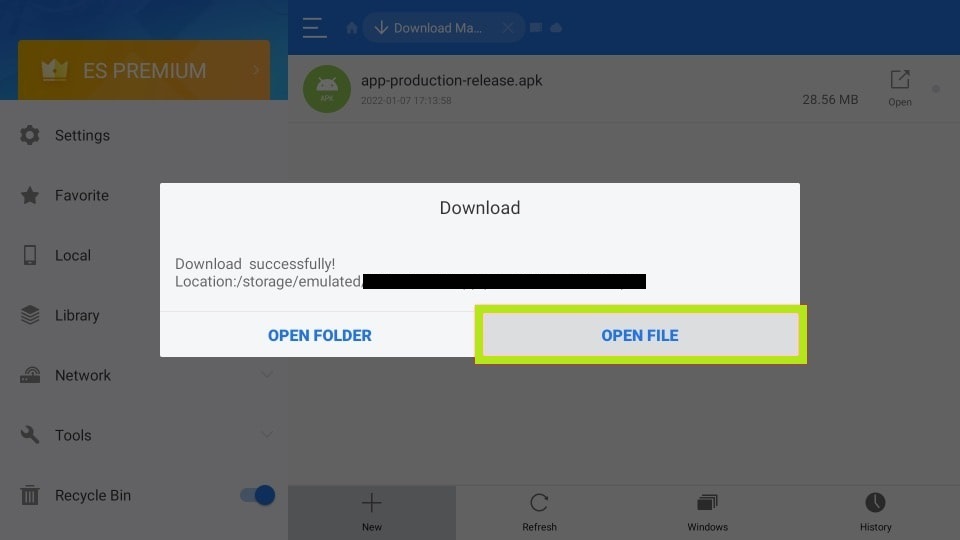
#9. Hit the Install button to download the app on Firestick.
#10. Once installed, launch the Bitdefender VPN app on your Firestick and run the VPN to access the geo-restricted content.
How to Use Bitdefender VPN on Firestick
#1. Open the Bitdefender VPN app on your Firestick.
#2. Hit the Sign In button and enter your account credentials.
#3. After signing in, choose any server location on Bitdefender VPN.
#4. Tap the Connect button to activate the VPN.
#5. Now, you can browse or stream content anonymously.
Bitdefender VPN: Features and Highlights
- It does not log or store the users’ data.
- Bitdefender is a user-friendly VPN service.
- This VPN masks your IP address and provides military-grade security to the users.
- It has 24/7 live customer chat support.
- This VPN is equipped with Split tunneling and a Kill Switch.
Bitdefender VPN: Pricing
This VPN service consists of two subscription plans. Both plans include a 30-day money-back guarantee. You can subscribe to any one of the plans on the official website.
- 1-Year Plan – $39.99/year or $2.50/month.
- 1 Month Plan – $6.99/month.
Best Alternatives for Bitdefender VPN:
The best alternatives for Bitdefender VPN are listed below.
Frequently Asked Questions
Bitdefender VPN is the secure and best VPN for Firestick.
Yes. You can use Bitdefender VPN for free. But you can access only limited features.
Disclosure: If we like a product or service, we might refer them to our readers via an affiliate link, which means we may receive a referral commission from the sale if you buy the product that we recommended, read more about that in our affiliate disclosure.